Showing posts with label stencil. Show all posts

Friday, 25 February 2011

homage

Homage project - my starting point was the paintings of Edward Pond as seen in train carriages through the 1980's and 90's;


I took inspiration from his simple stencil-like images and applied it to some modern buildings in Brighton  such as the Amex building on Edward Street;


The cage like structure of this building began to stand out and led to some more abstract work;


and photos of the stencil I used.... 


...led onto some monoprints


Coming back to ceramics, the black and white cage painting started suggesting Portuguese tile patterns from the 1950-70's, an area of particular interest. I have traced the central area of the painting and next I will follow the lines with pin-pricks through which I will try to paunce some pigment directly onto damp glaze...


Friday, 12 November 2010

smoking stencils

Beakers fired as hoped, the wax resist leaving a small un-glazed area for smoking;


Using white spirit soaked sawdust, a quick flash of heat seals in smoke pattern. This method produces a lighter smoke colouration than the traditional bonfire;


Result: Not bad, subtle as hoped, maybe a little too subtle? The smoke pattern looks better close up. May need a little something extra to lift them - doing a lustre firing today and am thinking a few gold spots might enhance these? Will review tomorrow when had a chance to see how lustre firing went.

Fast Forward? Noticed when photographing these beakers that the designs when lined up had a remarkable similarity to the markings on old cassette or video recorders...

Thursday, 11 November 2010

stencil

Not sure where to draw the line between paper-cut and stencils... think they are the same thing, name just changing depending on what you do with them. We played around with stencils in class this week so I am calling this thread 'stencils' from now on.

A great tip I did learn at school was about applying paint to a stencil and how to reduce bleeding; use a dry brush, thick paint in very small quantities and stipple rather than brushing or sponging.


I stencilled some slip-cast pots with a wax solution before dipping in clear glaze - the glaze not sticking where there is wax so leaving a clear, un-glazed area. The wax will burn away and I should be left with white pots of even colour but small un-glazed portions which will only be noticeable by a change in texture. I will then smoke the pots and the smoke should only stick where there is no glaze...


I took a little inspiration from Antje Laidler's charcoal drawings as well as my earlier Portuguese tile beakers, keeping the shapes simple and geometric. The smoking should add an interesting random element.

Friday, 29 October 2010

firing results 3

Tile inspired large stencil beakers. Much more successful that my previous attempt;


A nice, simple, clean design. The surface is a sponged on not-quite-white slip which makes an interesting and subtle texture to contrast with the pure white and smooth inner. The pattern in slightly raised from layers of black slip so again adding a subtle texture.

Not sure what, if anything to do with these next. Think I will have to live with them for a bit, see what they are like to drink out of, put flowers in, store paperclips in etc.

Tuesday, 26 October 2010

tile beakers

Its pouring with rain today and even at mid day its so dark that we need the lights on. A good day to labour over some more intricate paper-cuts to make some revised Portuguese tile inspired beakers.

I was not keen on my previous results. The colour was bad and I did not like the design. This time I have sponged the background of the beakers with an off-white slip. This will hopefully make the end result look less stark. I felt the shapes were too big for the size of beaker and so have reduced these (thanks to photocopier reduce button..). And there was just too much pattern last time too. Less is always more... Oh and I have abandoned attempt to use colour and am sticking with my favourite shades of black, gray and white;


Fingers crossed these turn out better than the last ones...

Saturday, 23 October 2010

kiln unloading; wire & paper

I did a biscuit and glaze firing over the last couple of days, firing the first few bits of my course related pieces. Being a bit experimental, some have come off well and others not worked. But I am excited by the process and it is throwing up new ideas.

1. wire


The basic wire sgrafito looks ok but a bit basic. The more abstract, contour based sgrafito however looks good and is an idea which could be taken further. I think a set with turquoise inner and this decoration outside would look great.

2. paper-cut


Less successful. The painted on cobolt solution looks scruffy and the sponged on slip is ok but too dark and the shapes too large for the pot. The dark colour against a white background is too stark for me too.

I do have ideas to take this forward though and am sketching more designs from a Portuguese tile source book. Rather than decorating the whole pot I am looking at doing a narrow vertical band, maybe two shapes wide, but with much smaller shapes than above. And maybe sponging a background colour to give texture and match the patterns tone more rather than stark white.

Friday, 8 October 2010

paper-cuts

First week of college, we are making paper-cuts. A great first project as it translates so easily into ceramics - Silhouettes, slip-resist, stencils etc

The paper cut we made was based on an electrical tape drawing we did as a group exercise;


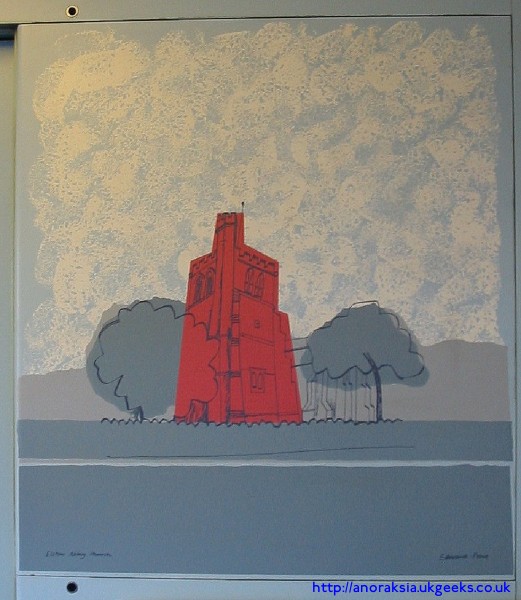
This picture was taken 24 hours after the tape was put up - It obviously did not stick very well but I kind of like its draping, collapsing quality.


The paper-cut version of the same landscape. The black paper would make a good slip-resist barrier/stencil. Tying this in to my Portuguese obsession, I am making some geometric paper-cuts loosely based on azulejos, using the paper-cut as a stencil to apply coloured slip to white slip-cast beakers.


Problem - sticking the paper-cut to the pot sufficiently well so that when applying colour, it does not leak under the paper...

First attempt; I gave up (ha ha, staying power!) and drew with pencil through the paper-cut then hand painted colour (weak cobolt oxide solution) into the pencil areas after removing the paper-cut. Worked ok but very time consuming and the painted on look not usually my thing.

Second attempt; sticking the paper-cut to the pot with weak glue before sponging coloured slip on. This worked ok, some leaking under the paper but not too much (easy to clean off with a craft knife). Paper-cut still useable for another pot so will try more with this method..


I think that this is an idea that could run and run. I have made up a batch of beakers and now just need to cut some templates and study some portuguese tiles...

Creative Commons License
This work is licensed under a Creative Commons Attribution-NonCommercial-ShareAlike 3.0 Unported License.